Every course created with LessonFlyer gets its own dedicated website. The Website Editor is what you use to edit the design and content of your course's website.
When a new course is created its website is initialized with a default design theme and some placeholder content. This is done to point you in the right direction and help you get started.
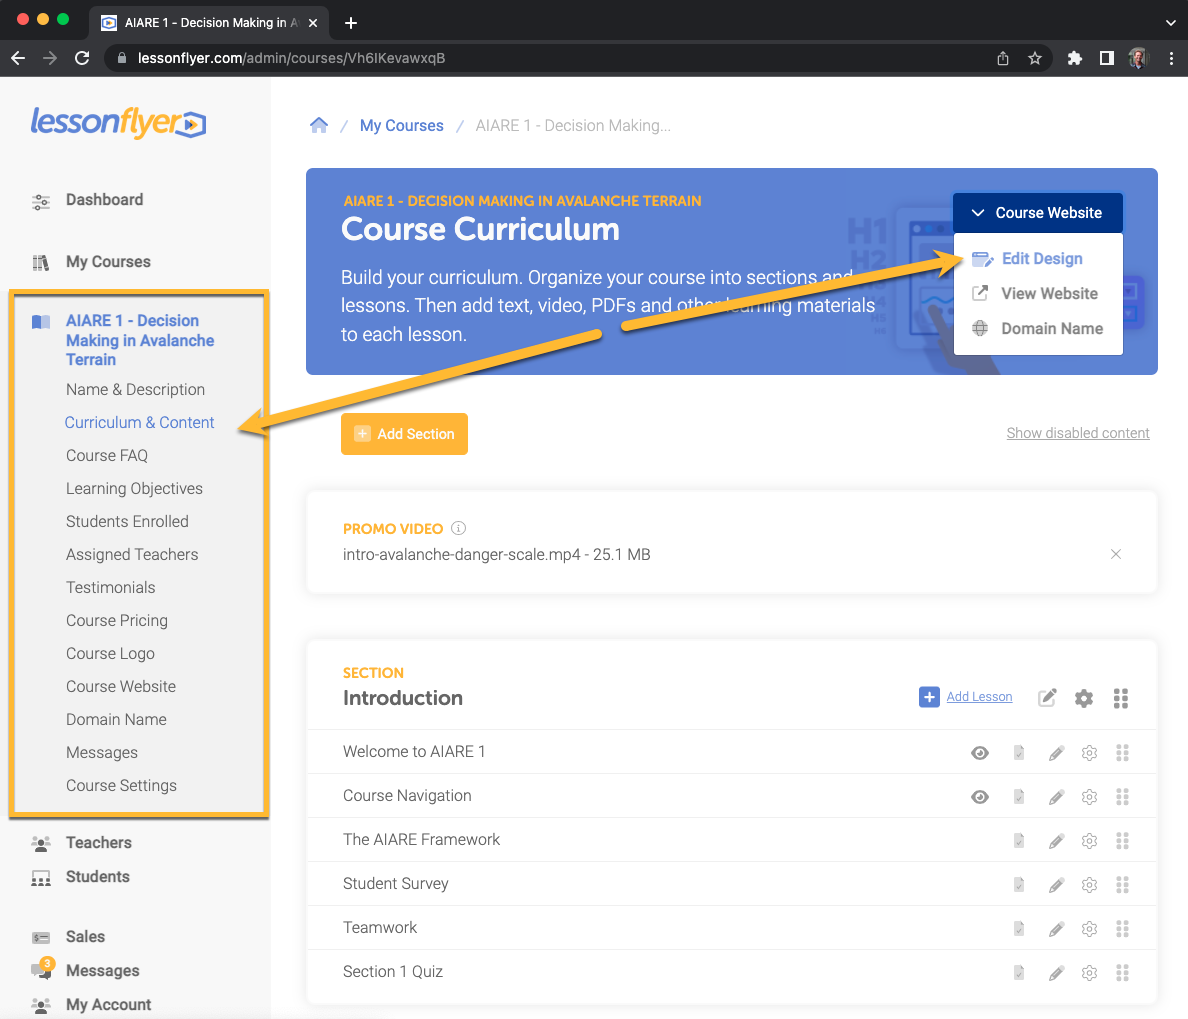
You can access the Website Editor for a course from any of the screens pointed out in the screenshot below. Since all of these screens pertain to the currently selected course they will have a Course Website button in the upper right corner.
To load the Website Editor: click the Course Website button and then select Edit Design from the dropdown menu.
When the Website Editor loads you'll see a preview frame showing the course's website and a toolbar with some controls along the top of the screen.
There's a light grey border separating the toolbar and the sides of your web browser from the preview frame. When you view the actual website the toolbar and grey border won't be there.

When you hover your cursor over the preview frame the elements of your website that are editable will highlight with an animated dashed border. Buttons also appear that you can click to edit the highlighted content.
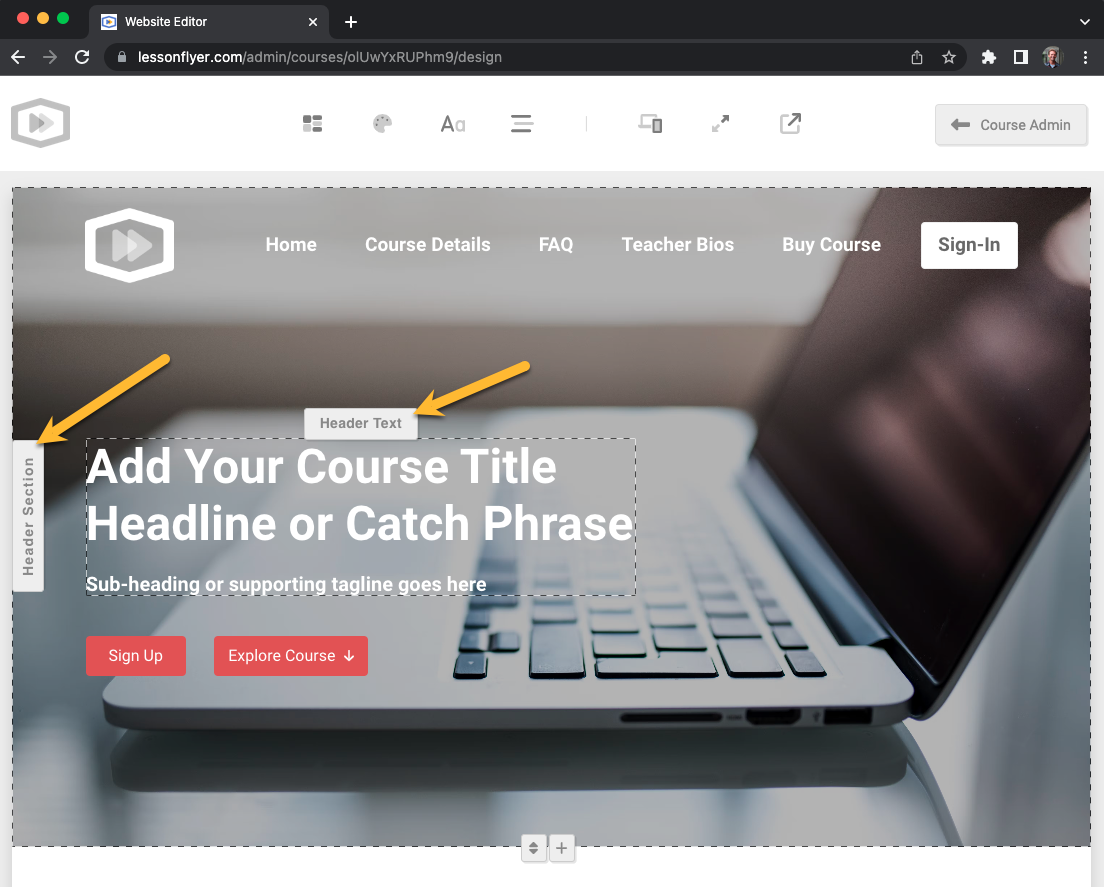
The buttons on the left side of the toolbar at the top of the website editor allow you to set global (top level) defaults for your site: Design Theme, Default Colors, Fonts, Navigation.
The buttons on the right side of the toolbar are used to preview your website on mobile devices, full screen in the editor or in a new window.
When you hover over a button on the toolbar a tooltip pops-up to indicate what it does.
You can exit the Website Editor anytime by clicking the Course Admin button on the right side of the toolbar.

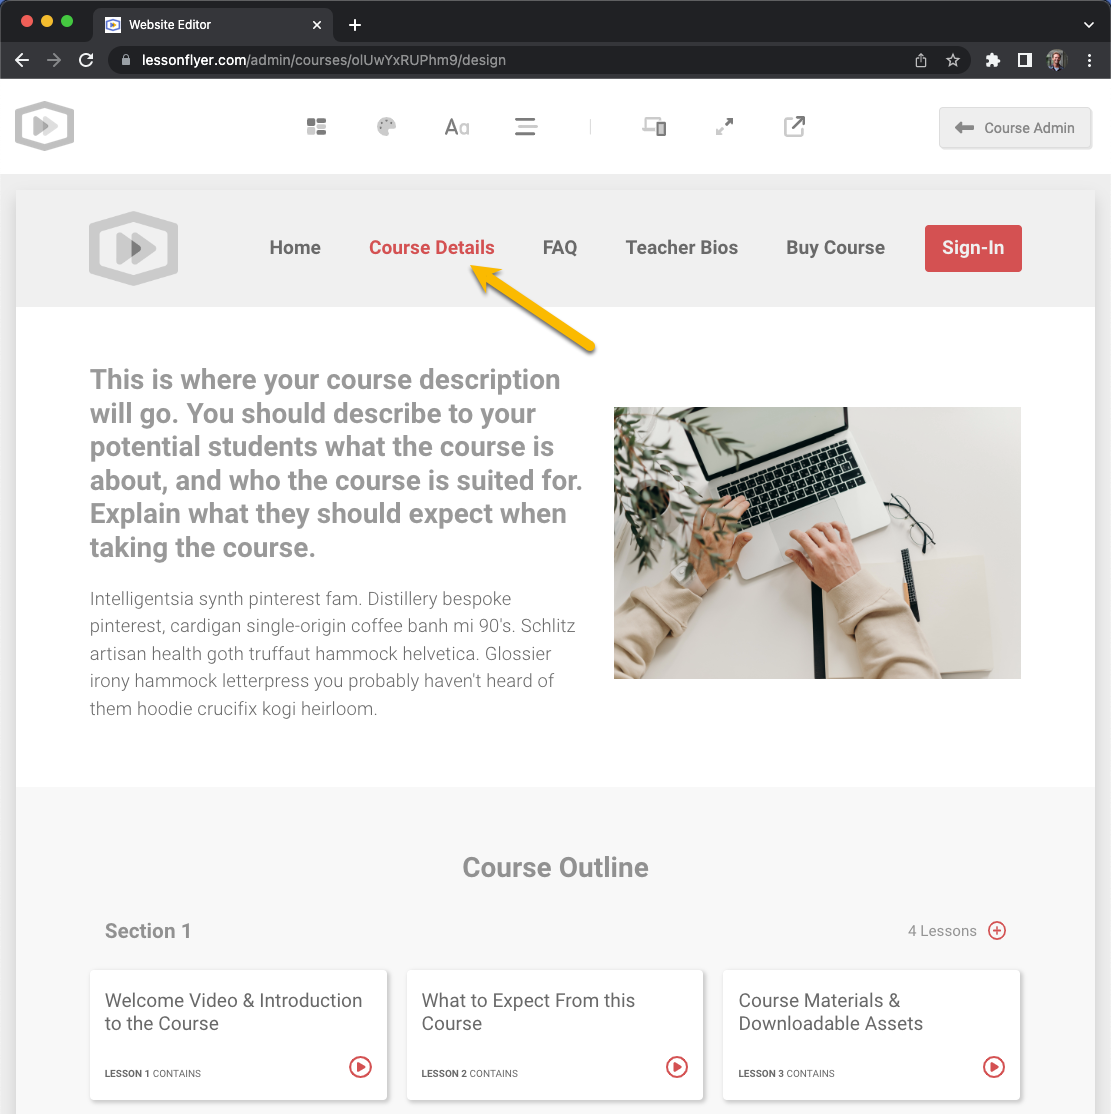
You can navigate to any page of your course's website from within the Website Editor's preview frame by clicking links as you normally would on a website.
The screenshot below shows that we clicked Course Details on the website's navigation bar to load this page in the editor.
As described above, you can hover over elements of any page and editable content will highlight.
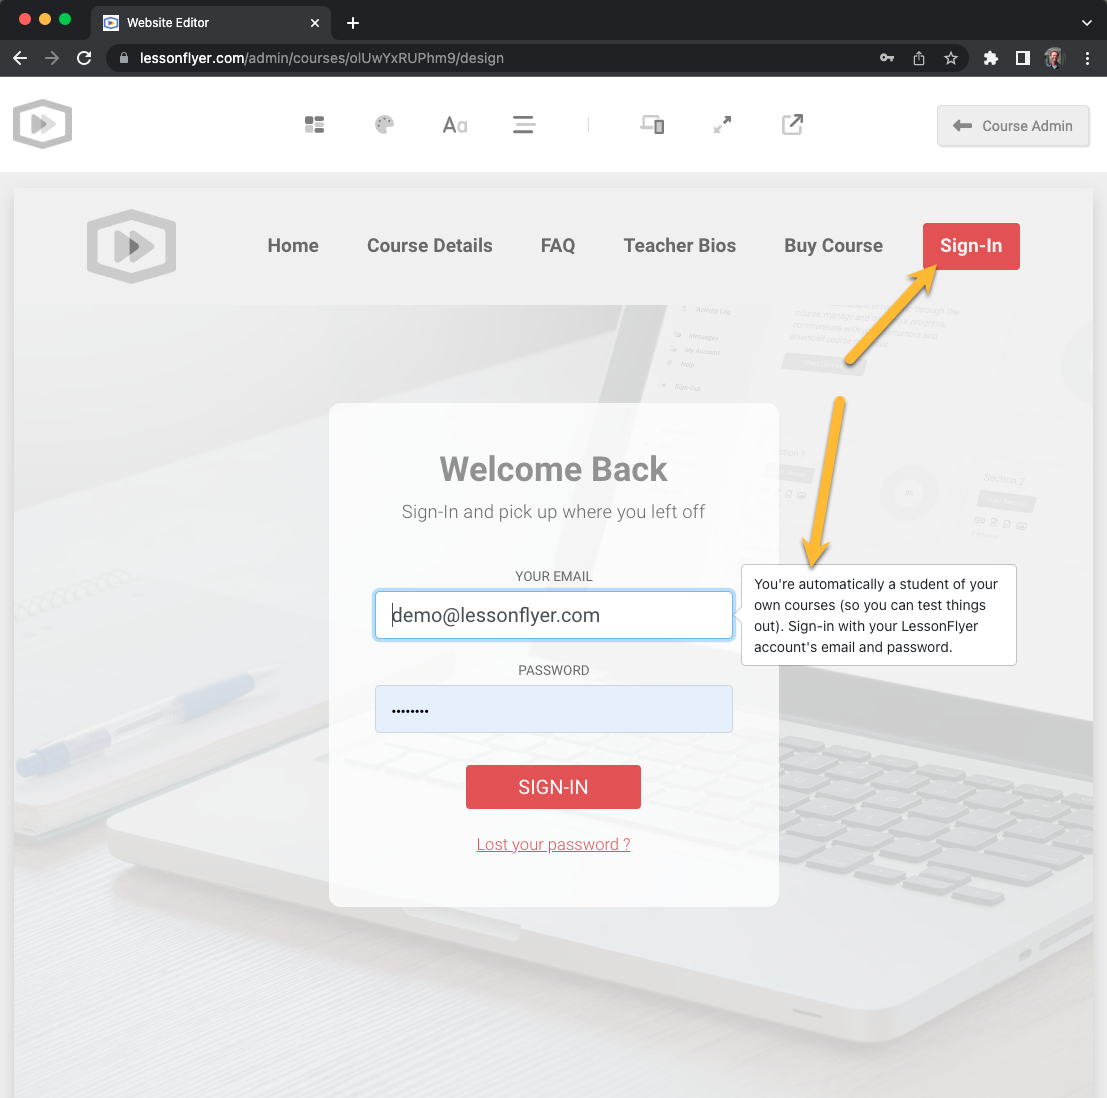
When a new course is created you (as an admin or teacher) are automatically enrolled as a test student in the course.
This allows you to sign-in to the Student Dashboard using the same email and password that you use to sign-in to the LessonFlyer admin panel. This is done so you can see what the student area looks like, edit its design and test things out.
To sign-in as if you were a student, navigate to the Sign-In page in the editor's preview frame and use your LessonFlyer email/password.
That's it for an overview. Please read our related help articles on the Website Editor as they dive in and explain how to use its many features.